
Before you start this lab, make sure you have read the chapters in the book on interfaces (chapter 4), classes (chapter 7) and object oriented design (chapter 8). You will be writing a lot of code in this lab, and you will need to be thoroughly prepared for it. You must have pre-written the code for the pre-lab; writing additional code beyond that will give you more of a chance to experiment in lab.
As usual, you should read the 6.030 general information handout for the collaboration policy. For this assignment, you may discuss the project in as much detail as you like with your classmates, but you should do the writeup on your own. You may also get comments from other students on all portions of your writeup before turning it in, if you wish. Please include the names of anyone with whom you collaborate, in any way, on this assignment, and indicte the nature of the collaboration. [Failure to include this information is a violation of the collaboration policy.]
You will be printing out and turning in the code you write for this lab. This code must be your own. We do encourage you, however, to ask your classmates for help debugging. Helping someone else debug their code is a great way to improve your own programming skills.
This assignment emphasizes the following topics
This assignment is due at the beginning of class on Friday, 1 October.
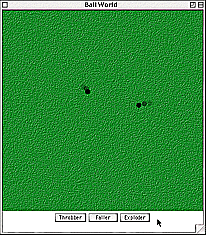 When you run
the code for this lab, a window will appear like the one at the right. The
window contains a "grassy" area at the top, and a set of buttons on the
bottom. Each of the buttons represents a Java class that you will write.
Remember that Java classes are like object factories. When you click on one
of the class buttons the class (factory) will stamp out a new instance of the
class, and a new ball will appear in the grassy area. How the ball behaves
will depend on the class that is used to create it. By defining several
different classes, you will be able to create balls of several different
types. Each class represents a different kind of ball. Different
kinds of balls can behave in different ways. One kind of ball might bounce
around the screen. Another might grow and shrink in size. Still another might
sit still until you grab it with the mouse and drag it around. Each of
these kinds corresponds to a different class. You can, of course, have
multiple balls of each of these kinds -- multiple instances of each of these
classes.
When you run
the code for this lab, a window will appear like the one at the right. The
window contains a "grassy" area at the top, and a set of buttons on the
bottom. Each of the buttons represents a Java class that you will write.
Remember that Java classes are like object factories. When you click on one
of the class buttons the class (factory) will stamp out a new instance of the
class, and a new ball will appear in the grassy area. How the ball behaves
will depend on the class that is used to create it. By defining several
different classes, you will be able to create balls of several different
types. Each class represents a different kind of ball. Different
kinds of balls can behave in different ways. One kind of ball might bounce
around the screen. Another might grow and shrink in size. Still another might
sit still until you grab it with the mouse and drag it around. Each of
these kinds corresponds to a different class. You can, of course, have
multiple balls of each of these kinds -- multiple instances of each of these
classes.
All balls, no matter what their class, share some characteristics. A ball must have horizontal and vertical coordinates. It must have a size. It might even be able to respond to the mouse or keyboard. In fact, every ball will have to respond, but some will respond by doing nothing. We'll capture these concepts of "ballness" in an interface.
The distinction between interfaces, classes, and objects can be confusing, so we'll recap it here and elsewhere in this lab:
As long as the classes that you write implement the Ball interface, the graphics code that we've already written will know how to ask your object what its position and radius are.
Interface
|
Class
|
Object
|
This week, you gotta do it yourself.
You'll be creating an entire class from scratch. The class is a template for all of the information you might want about a ball: its horizontal and vertical position, its radius, some interaction with the user, and the behavior that the ball displays.
The cool part about this lab is that you'll be able to write different classes for different behaviors: one class might describe the rules for a ball that bounces off the sides of the window, one class might describe the rules for a ball that just stays in one place and gets bigger and smaller, and one class might describe the rules for a ball that gets bigger and then splits into two balls.
So how does this work? The code you write is pretty simple. All you really need are methods that describe where your ball is, how big it is, and what to do when the user clicks or types at your ball. Other classes that we've already written will take care of displaying your ball on the screen.
The answer is that we will define an interface (actually, two of them), which specify the methods you must write. The two interfaces are Ball and Animate. Together, these two interfaces specify seven methods that you must write for your class. We'll get to the actual methods below. Remember, interfaces are contracts that specify what behavior will be provided. An interface doesn't provide the behavior, though.
It may be that your class needs to talk to our class to get some information, like the size of the window. How do we allow you access to the important parts of our class without exposing all the gorey graphics and other methods? We do that with yet another interface, World. This time, we've implemented the World interface; you can use our methods, and you don't have to write any of these yourself.
public interface World
{
   public double getMinX();
   public double getMinY();
   public double getMaxX();
   public double getMaxY();

   public Ball getClosestBall(Ball fromBall);
   public void addBall(Ball aNewBall);
   public void removeBall(Ball toBeRemoved);
}
If you happen to have an object that implements World you can use it
to get the minimum and maximum x and y values of the window. (Don't panic.
Our code will give you a full-fledged World object in one of your
methods. See below.)
| Sidebar: when we say "a World object," what we really mean is an object that is an instance of a class that implements the World interface. That is, the object contains all the methods that are defined by the World interface. |
Ball myNeighbor= theWorld.getClosestBall(this)and now the myNeighbor variable points to the ball closest to your ball. Be very careful! If your ball is the only ball on the screen, then getClosestBall will return null.
The addBall method is useful if you have created a brand new ball from scratch, and you want to tell the World about it so that it'll appear on the screen. The removeBall method tells the World to erase the ball you passed as a parameter and forget that it ever existed.
public interface Ball
{
   public double getX();
   public double getY();
   public double getRadius();

   public void setWorld(World theWorld);

   public void userClicked(double atX, double atY);
   public void userTyped(char key);
}


public interface Animate
{
   public void act();
}
Some of these methods are pretty obvious: you should make getX(), getY() and
getRadius() return the appropriate values. Where do you get these values?
You have complete control of how these values get set. You can make them up
out of whole cloth. These getter methods are called by our graphics class to
figure out where to put your ball. You can tell the graphics class anything
you want about where to put your ball, and the graphics class will oblige.
(You might want to make sure it is within the visible window of the world,
though....see World's getMinX etc. methods....)
When the user clicks the mouse on the screen representation of your ball, our graphics class finds your ball object, and calls the userClicked method that your ball provides. It tells the userClicked method the x and y coordinates of the click. Similarly when the user clicks on your ball and then types a key, our class calls your userTyped method with the character that was typed. You need to implement methods that tell your ball what to do in these circumstances. In the beginning, you might want to do absolutely nothing. You will still have to provide a method, but the method doesn't have to do anything. Of course, if you want to make your ball interactive (later), the methods are there.
The remaining Ball method is setWorld. Our behind-the-scenes class calls your setWorld method with an object that implements the World interface. If you want to use it later to figure out the bounds of the screen, for example, then you better save it away in a field.
One thing that the Ball interface doesn't cover is how to make your ball have an independent behavior. We use the Animate interface for that. For as long as your ball is on the screen, the act method will be called over and over again. The act method is very much like the code that you wrote last week for the etch-a-sketch lab. The act method is the heart of your ball's behavior: it is the rule that your ball will use to figure out what to do.
Remember that one class can implement more than one interface, so you should only have to define one class for any given ball type.
Q: Your ball classes will implement both the Ball and Animate interfaces. Suppose you want to write a ball class called "Bouncer". How would you write the first line of the class?
Q: What methods must your class have?
Q: Write an entire class called Dud that implements Ball and Animate. The ball represented by a Dud object should just sit at (0, 0) with a radius of 5 and should do absolutely nothing.
Q: What would happen if you created two Dud instances?
Q: The Dud class you just wrote didn't really need any fields (if you used fields anyway, then you were probably thinking ahead). Suppose that we want to keep the x, y, and radius values for the class in fields, so that later we can change their values. What would you have to add to or change in the Dud class to do this?
Q: Read ahead in this lab to the place where you define the act method in the Bouncer class (under Zooooooom!). Write down the fields you'll need for Bouncer, and also write down the body of the act method, and the constructor.
Q: Check out the following code. Assume that theWorld is a field that has already been set up appropriately, and that the code you're looking at is part of a method in a class that implements Ball. Can you figure out what might go wrong? (Hint: look carefully at the documentation for the World interface, above.) How would you fix it?
   Ball closest = theWorld.getClosestBall(this);
   double xdist = closest.getX() - this.getX();
package ballworld;Now you must save the file that you just typed. Java has some pretty strict naming conventions for files. The name of your file must be the name of your class with ".java" appended. In this case, choose "Save As..." from the file menu, make sure you're in the ballworld directory, and type Dud.java as the filename.
Once you have saved the file, you can add it to your project. Make sure your Dud.java window is at the front, and then select "Add Window" from the Project menu.
What methods must your Dud class implement? Make them as simple as possible.
Compile your code and make sure there are no compiler errors. If you get a bug, and you can't seem to figure out why, please ask a classmate or one of the LA's for help. Debugging is an art that takes a lot of practice and experience. Helping other people debug their code is a great way to get that experience.
Before you run the code, you must tell the program the name of the class you wrote. Select "Java Application Settings" from the Edit menu, and select Target / Java Target. Make sure that the Main Class reads ballworld.BallWorld and type Dud into the Parameters window. As you create more classes, you'll add the class names to the Parameters list, each separated by a space.
Save the Java Application Settings, and run your code. You should see a green field with a button underneath that reads "Dud". Push the "Dud" button. Voila! a black dot in the center of the green field.
Change the userTyped method so that when the user types a 'd' character, your method tells the world to remove this ball. Did you remember to keep the World object from setWorld in a field so you could use it later? If your field was named world, you can write this.world.removeBall(this); The removeBall method will remove your dot from the screen and stop calling your act method.
Compile and run your new Dud code. If that worked, we can make Dud even more interactive by changing the x and y locations when the userClicked method is called. Make sure you have x and y fields, and set them according to the parameters in userClicked. Compile and run, and now you've got a dud you can drag around with the mouse. Try it!
Once again, choose "New Text File" from the File menu. Copy and paste the entire Dud class from the Dud.java window to this new window. Rename this class Bouncer by changing class Dud to class Bouncer. Save the file as Bouncer.java and then choose "Add Window" from the Project menu.
Note: be very careful when copying large chunks of code from one class to another, or even from one method to another. There are all kinds of things that can go wrong when a field from one class gets copied and then changed in another class. The only reason we're having you copy the text now is that it's a pain in the @#%$! to retype the entire thing over again. Later in the course, you'll learn all about how to take advantage of code you've already written so that you don't have to do these massive, dangerous copy and pastes.
The body of the act method is almost exactly like the code you wrote for the etch-a-sketch lab last week. For this class file, you'll use the constant-velocity code you wrote last week. Remember that you'll need fields for x and y, and for xVel and yVel, the x and y velocities.
Let's initialize the xVel and yVel fields to 0.1 and 0.2, respectively.
There are two ways to do this. One is simply by defining the values on the
same line that you declare the names and types:
double xVel= 0.1;
A nicer way to do this is in the class's constructor. The constructor for the Bouncer class would look like this:
public Bouncer()
{
   // constructor stuff goes here
   // ...
}
You can initialize xVel and yVel to a random velocity by saying Remember that the constructor doesn't have a return type, just a name, and that name must match the name of the class exactly. Inside (where we have a comment), you can put any initialization code you want. This code will be executed just after the object is created out of raw stuff, but before anything else happens. In particular, be careful, because there is no World that you know yet! So you can't use world.getMaxX(), for example, to do anything. Can you figure out what would happen if you tried?
Since you've written a new class, you need to tell the program about it by adding Bouncer to the Parameters list in the Java Application Settings box off the Edit menu.
Compile and run your code. Now the balls drift off the top right side of the window. Note that your Duds are still duds. Change your act method in the Bouncer class so that the ball bounces off the sides, rather than drifting off the window completely.
You might be concerned at this point whether you can use your world field in the act method. If you are concerned, that's great! If you aren't concerned, you should probably try to figure out why you should be concerned. Once you've done that, put your concerns to rest, because we've written the World object in such a way that we can guarantee that your setWorld method will be called before your act method is called.
Compile and run your new bouncing code. Hit the Bouncer button a bunch of times. Yeeeeha.
Change the act method so that in addition to drifting, the radius slowly gets bigger (say, 0.03 per tick). Have the radius start at 2. When it reaches 5, make the ball explode by removing it from the World.
Add Exploder to the Parameters list, and compile and run your code to make sure it works.
Let's do some fireworks. Just before the Exploder removes itself from the world, we're going to make it add two brand new Exploders. Remember that to create a new object from a class, you use new:
Exploder exp1= new Exploder();
Exploder exp2= new Exploder();
We can add the new Exploders to the world by using:
world.addBall(exp1);
world.addBall(exp2);
Unfortunately, this puts the new Exploder balls in the center of the screen, instead of wherever the old Exploder had gotten to. How can we set the x and y values of the new object to the x and y values of the old object?
We can actually write a second constructor for this class:
public Exploder(double startX, double startY) {
   // initialization stuff
   // ...
}
The initialization should set x to be startX and y to be startY in addition
to whatever initializations you did in the other constructor. Where do startX
and startY come from? You can pass them in when you create the object with
new:
Exploder exp1= new Exploder(this.getX(), this.getY());Convince yourself that this works, and then try it. You should get a massive explosion on the screen, and then it should quickly die a painful death, trying to deal with thousands of individual balls on the screen.
This is the end of the target exercise. Anything you do beyond here is gravy.
How about falling balls (balls that accelerate down, and bounce when they hit the edges)?
How about falling balls that shrink in size and disappear when they get a radius smaller than 0.5?
How about the last generation of Exploders turning into these disappearing fallers instead of more Exploders?
Have fun!
also note the following:
This course is a part of Lynn Andrea Stein's Rethinking CS101 project at the MIT AI Lab and the Department of Electrical Engineering and Computer Science at the Massachusetts Institute of Technology.
![]()

Questions or comments:
Last modified: Thu Jul 10 13:01:20 1997
